


AI 3D printing models are changing how creators, developers, and engineers approach rapid prototyping and digital fabrication. Instead of wrestling with Blender for hours or waiting on a freelance modeler, you can now generate a 3D-printable mesh from a simple text prompt, refine it for manufacturing, and export it as a ready-to-slice STL file—all in your browser. TimrX makes this process accessible, modular, and, frankly, shockingly fast.
The Modern AI 3D Printing Pipeline
Here's the thing: most people still think of 3D printing as a manual, CAD-heavy process. But that's changed. With tools like the TimrX AI 3D model generator for printing, the workflow is now prompt-driven, modular, and browser-native. The full TimrX pipeline is: IMAGE → MODEL → REMESH → TEXTURE → RIG → ANIMATE → VIDEO. For print, you only care about this path: Prompt → Model → Remesh → Export STL. Every step is visible in the sidebar, letting you jump between stages or re-run modules as needed. It's not one monolithic export button—it's a set of powerful, interchangeable tools optimized for AI 3D printing models.
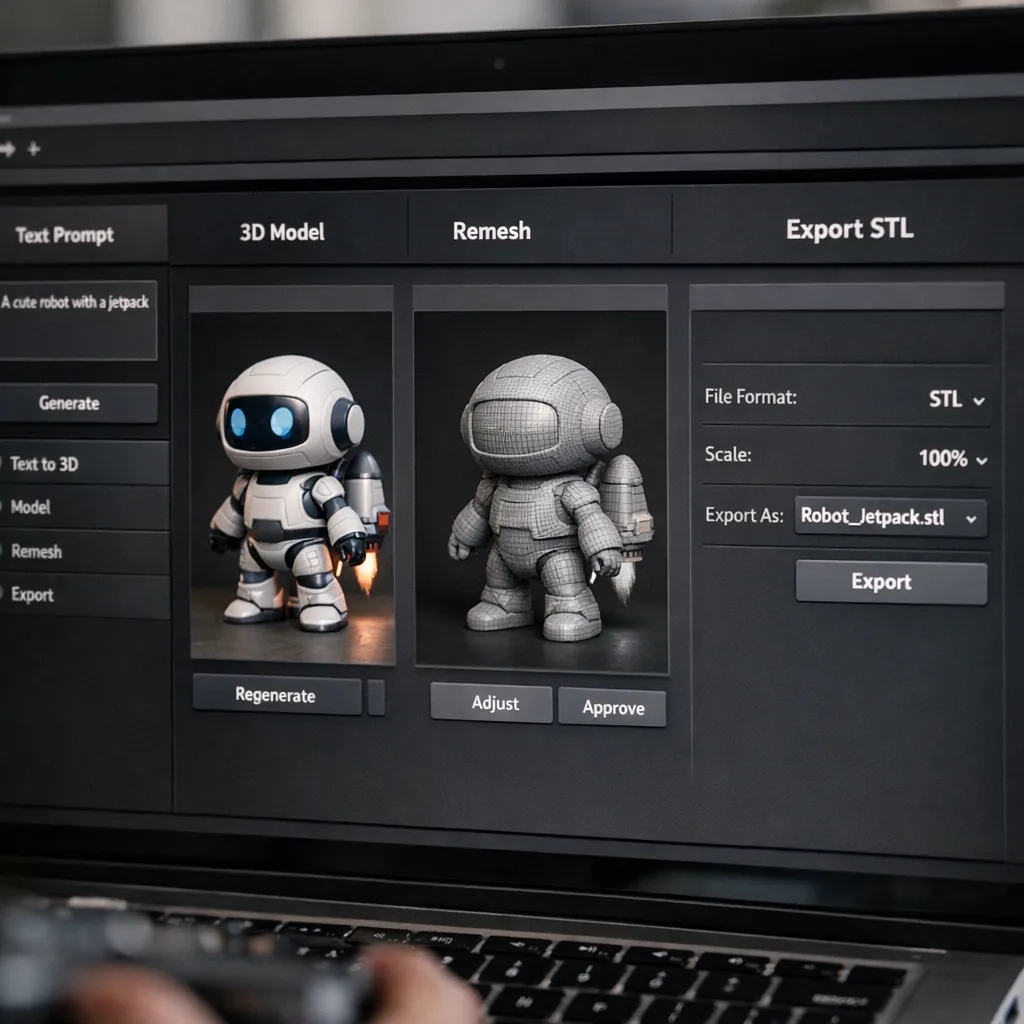
Step 1: Generate a 3D Model from Text
Start with a prompt like: "a stylized wizard figurine, fantasy, cloak, staff." The text-to-3D engine interprets your description and creates a rough mesh—usually in seconds. The initial output isn't a Pixar-grade asset. Instead, you'll see a mesh with recognizable shapes and features, but lacking the polish you'd want for printing. This is intentional: AI mesh generation prioritizes capturing your idea fast, not perfecting topology on the first pass. For details on prompt engineering, check out How to Write Better AI Image Prompts.
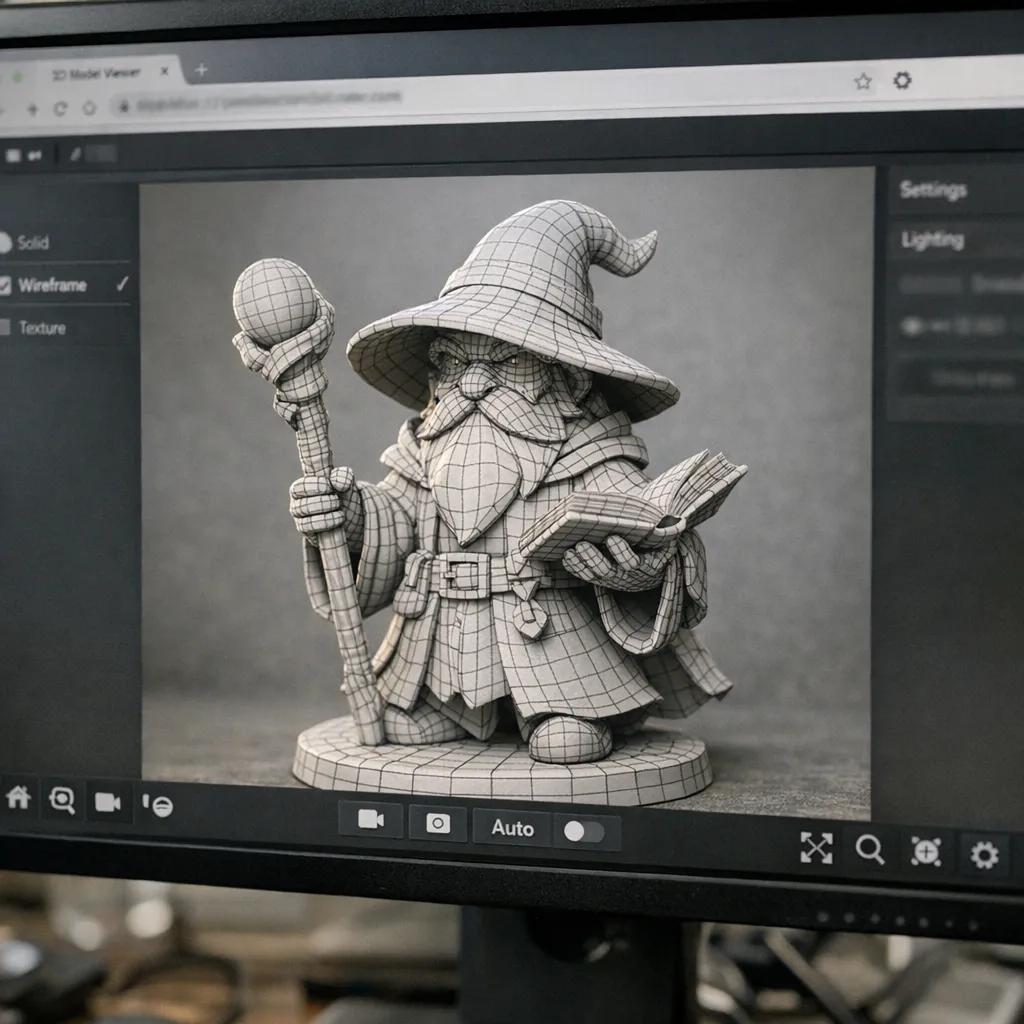
Step 2: Inspect the Generated Model
Click into the preview. Rotate the mesh, zoom in, and check the geometry. You'll often see rough edges, non-manifold faces, or internal geometry that would cause a print to fail. This is why the next steps—remeshing and validation—exist. AI models are fast, but raw output is rarely production-ready. If you've ever tried to print a model with floating fragments or zero-thickness areas, you know the pain. In short: always inspect, never assume.
Step 3: Remesh for Print Readiness
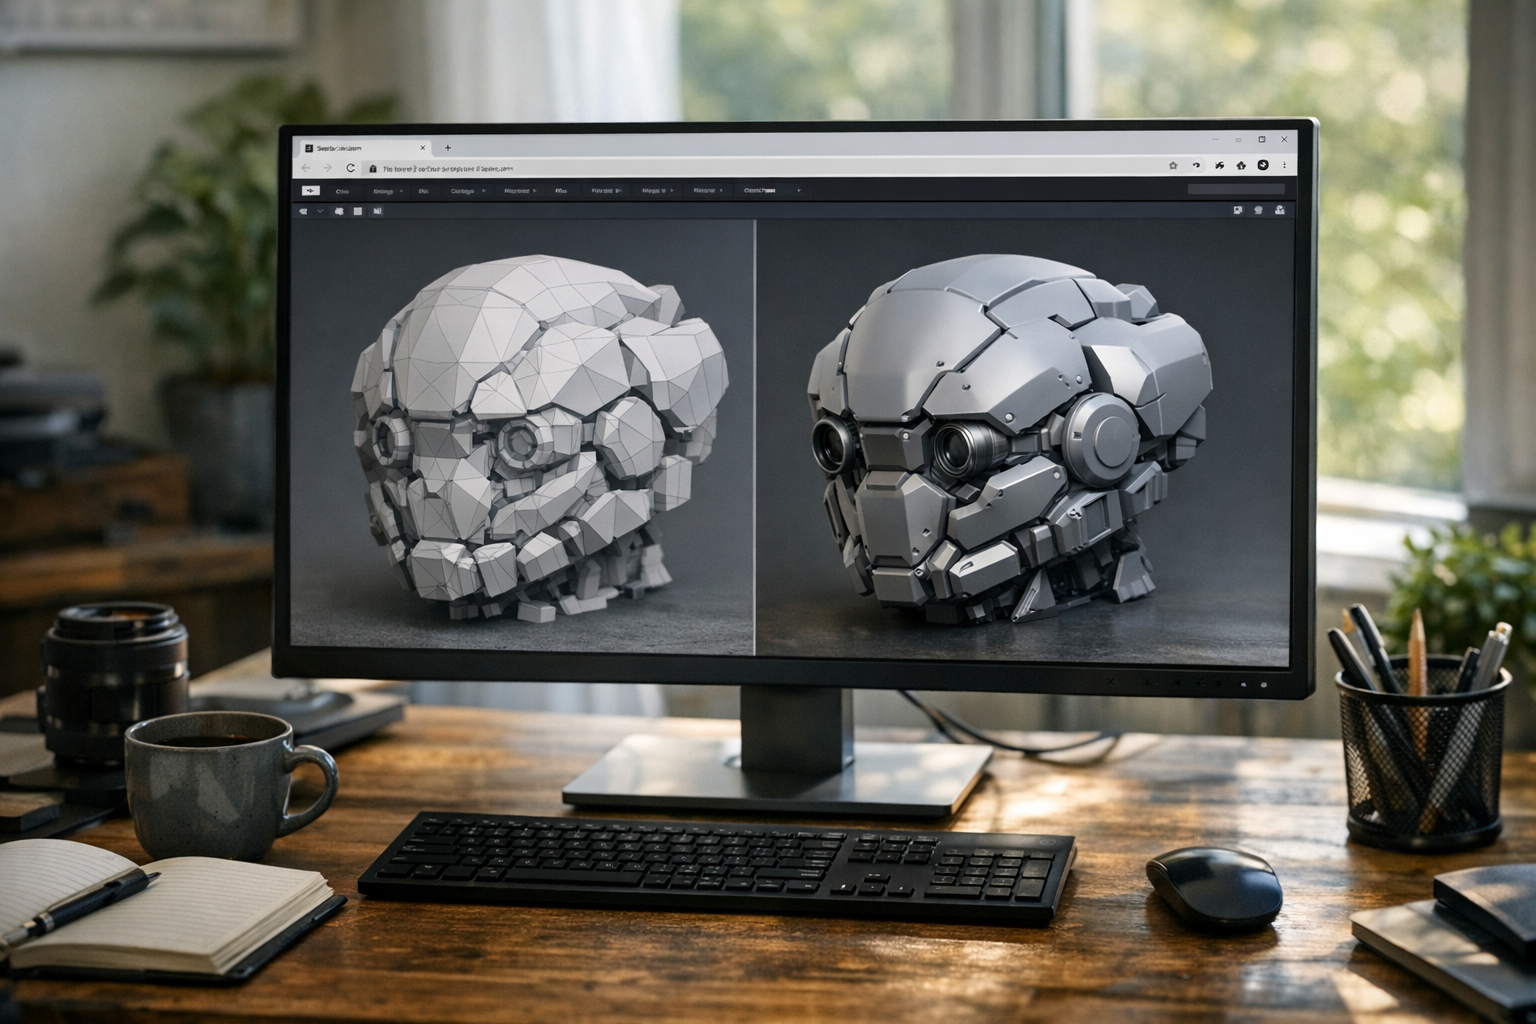
Here's where TimrX stands out. The "Remesh before export" step takes your rough geometry and rebuilds the mesh with printing in mind. Cleaner topology, reduced noise, and a focus on watertight, non-overlapping faces. There's even a print-ready preset that optimizes for common FDM and resin printers: smoother surface, lower risk of artifacts, and better support calculation downstream. In my experience, skipping remeshing means gambling with print reliability. It's not worth it.
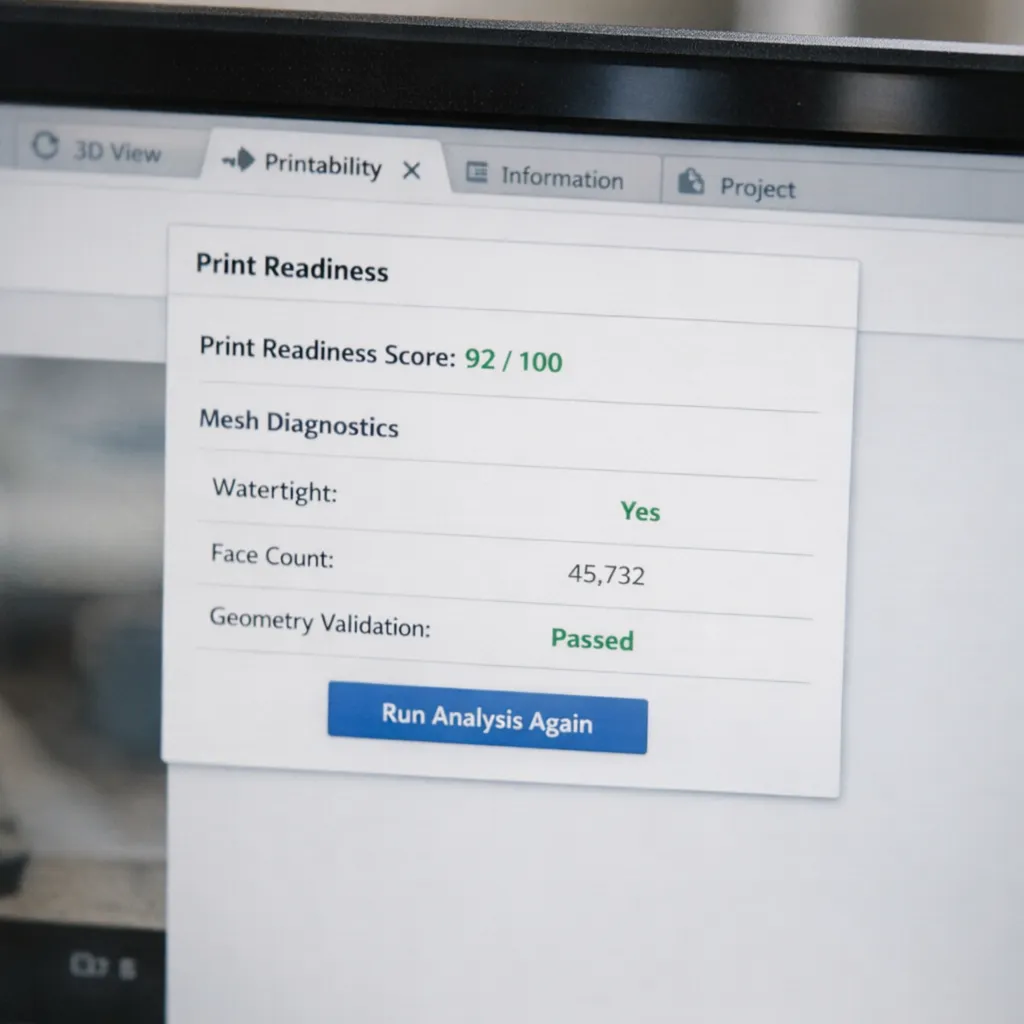
Step 4: Print Readiness Check (Real Feature)
After remeshing, TimrX runs a Print Readiness Check. You'll see a print readiness score—say, 90 (Excellent)—along with diagnostic flags: watertight, face count, clean faces. "Excellent" means the mesh is manifold, has no major holes, and no non-planar faces. If you see warnings (e.g., "Not watertight" or "High face count"), fix them now. This step is non-negotiable for anyone who actually wants a successful print. The print readiness score is your green light (or red stop sign) for the next stage.
Step 5: Adjust Scale and Dimensions
With a print-ready mesh, set your target size. Enter a target print height (e.g., 120mm), and TimrX automatically rescales the model, updating width and depth accordingly. This matters—a model that's too small may lose detail, while one that's too large won't fit your printer. Double-check the dimensions. It's the difference between a desktop figurine and a failed job. I've seen creators overlook this, only to discover their mini wizard is now a 3mm tall pixel blob.
Step 6: Select Printer Type
Next, choose your printer type. FDM (filament) and resin workflows have different needs. When you select FDM, TimrX automatically adjusts wall thickness and overhang thresholds. Why does this matter? FDM printers struggle with steep overhangs and thin walls; resin printers handle fine detail but are sensitive to unsupported geometry. This one-click adjustment saves hours of manual tweaking.
Step 7: Fix Orientation and Overhangs
Good print orientation is everything. In TimrX, rotate your model (say, tip the wizard back 90°) to minimize overhangs and improve support placement. The interface highlights overhang percentages, making it clear when you're in the danger zone. Proper orientation reduces print time, saves filament, and boosts success rates. If you've ever watched a print fail halfway up a staff or hat, you know why this step matters.
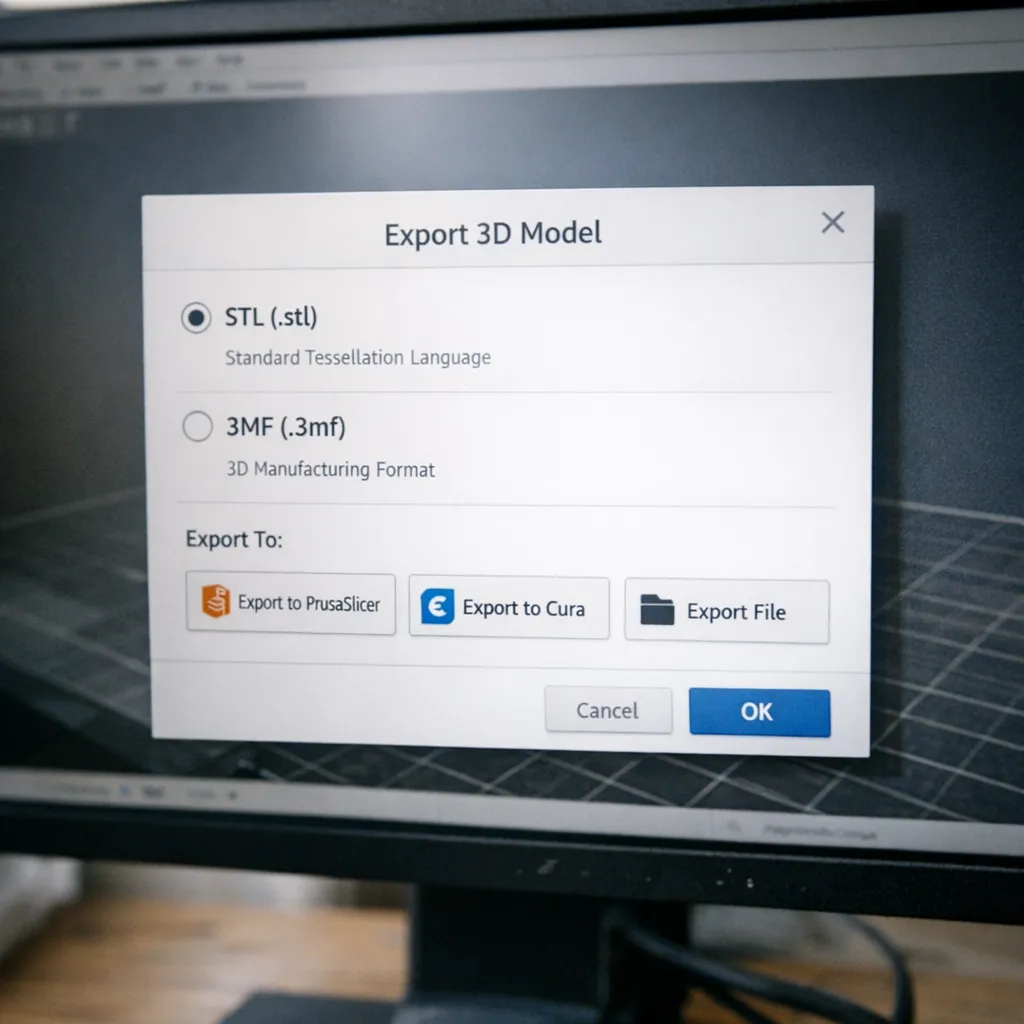
Step 8: Export STL or 3MF
Now, hit the Export STL button. TimrX also supports 3MF if you want richer metadata or are slicing with advanced tools. STL is the universal standard and works everywhere, but 3MF carries info like colors or multiple meshes. For most 3D printing pipelines, STL is the go-to. If you need to convert from GLB/OBJ to STL, TimrX handles that transparently during export.
Step 9: Open in Slicer
Open your exported model in a slicer: PrusaSlicer, Cura, OrcaSlicer, or Bambu Studio. These tools generate the G-code your printer needs. Here you can add supports, tweak layer height, and preview the print. Slicers let you inspect every layer—catching issues like floating parts or thin walls before a single millimeter of filament is wasted. If you want a deeper dive into creative AI workflows, see From AI Image to 3D Model: Inside the TimrX Creative Pipeline.
Step 10: Final Print Preparation
AI-generated models are, by nature, approximations. Even with remeshing, some meshes have internal fragments or odd geometry. Always inspect your model in Blender, Meshmixer, or the slicer before printing. Delete hidden geometry, fix non-manifold edges, and make sure the mesh is truly watertight. The extra five minutes here saves hours of failed prints. For advanced tips, check out TimrX 3D print workflows.
Important Rules for AI 3D Printing
- Textures don’t affect prints—geometry is what matters.
- Always use manifold meshes.
- Orientation directly impacts cost and print time.
- Validate mesh integrity before slicing.
- Remeshing is non-optional for reliable prints.
Real Workflow Example
Let’s do a real run: Prompt—"a stylized wizard figurine, cloak, staff". Generate the base mesh in TimrX. Inspect for obvious errors. Remesh with the print-ready preset. Check the print readiness (score: 90, watertight, face count reasonable). Set print height to 120mm, select FDM printer, rotate for minimal overhang. Export as STL. Open in PrusaSlicer, add auto supports, preview layers, and export G-code. Print on a Bambu X1C. The result: a surprisingly detailed wizard, ready for paint. This workflow, front-to-back, takes less than an hour.
Why TimrX Simplifies This Workflow
TimrX is browser-based. No Blender or paid plugins required. The workflow is integrated: one-click fixes, modular pipeline, and print readiness scoring built in. For learning resources and platform updates, see TimrX Hub and our blog archives. The point is: you spend less time fighting software and more time making things.
Limitations of AI 3D Printing
No AI pipeline is perfect. Sometimes the geometry is odd, or the mesh isn't fully watertight. You still need to validate before printing. Production-ready results are possible—but not guaranteed, especially for highly technical or functional parts. Think of it as a rapid prototyping tool, not a replacement for expert CAD (yet). For a deeper technical dive, read How AI-Generated Models Are Transforming 3D Printing.
Future of AI + 3D Printing
Automated, end-to-end pipelines are coming. Expect direct printer integration, smarter geometry validation, and real-time printability feedback. The gap between text prompt and physical object is shrinking fast. My bet: we'll see voice-to-print workflows and AI-powered mesh repair as standard within a few years.
Conclusion
Generating AI 3D printing models from text and exporting print-ready STL files is no longer a fantasy. With TimrX, it’s accessible, modular, and powerful—whether you’re a seasoned developer or a weekend hobbyist. The real-world workflow is simple: prompt, model, remesh, validate, export, slice, print. Try it yourself at TimrX AI 3D Generator—and push the boundaries of what’s printable.
FAQ
Can AI generate STL files directly?
Yes. Modern AI 3D model generators like TimrX let you generate an STL from a text prompt with export-ready geometry.
What is print readiness score?
It’s an automated check of mesh quality (watertightness, face count, geometry) to predict 3D print success.
Why do I need remeshing?
Remeshing cleans up the AI-generated model, making it printable by fixing geometry, removing artifacts, and ensuring manifold topology.
What is a watertight mesh?
A mesh with no holes or open edges—critical for 3D printing, as slicers require closed geometry.
Which format is better: STL or 3MF?
STL is the universal standard for most printers. 3MF carries richer data but isn’t as widely supported yet.
No validation references for this post.


Comments 0
Be the first to comment on this post.